
Starting Onions From Seed: From Tray to Garden
Start bulb onions from seed with practical sowing, germination, lighting, trimming and watering steps, then harden off and transplant them outdoors.
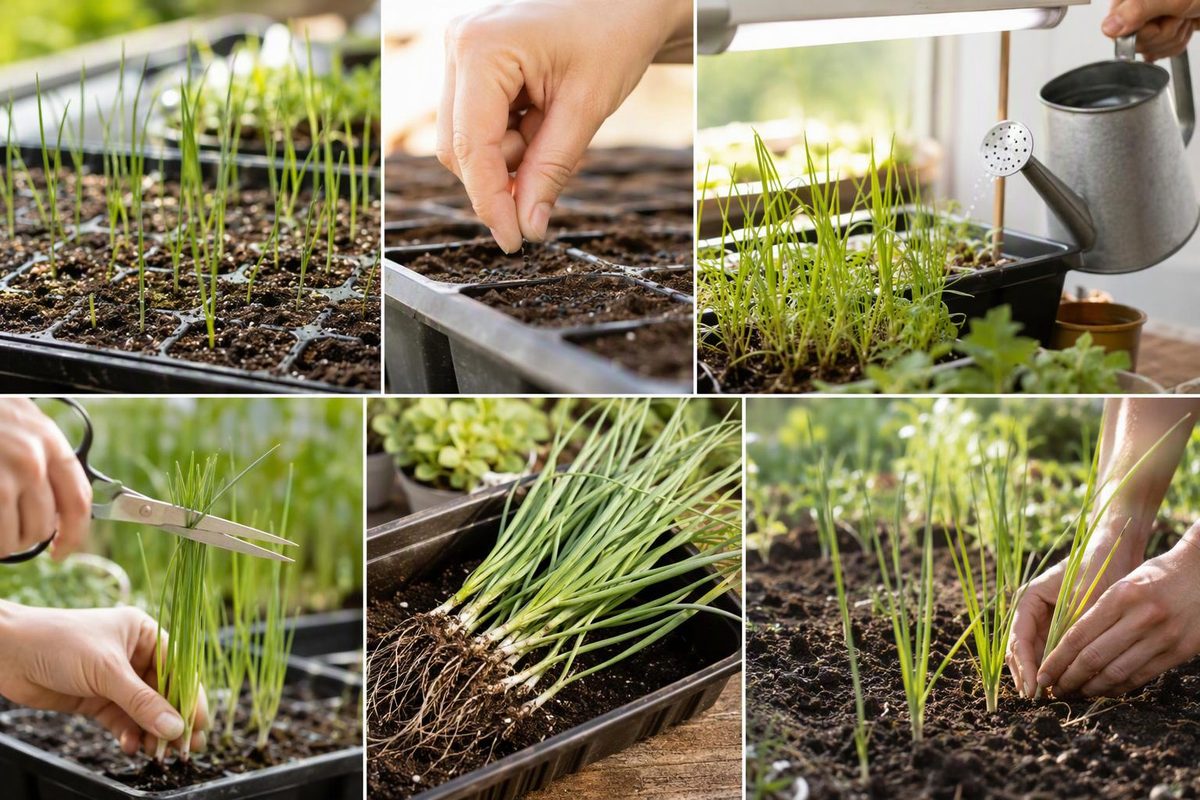
Sow bulb onion seeds shallowly in moist seed-starting mix, keep them warm until they emerge, then switch to bright light and cooler growing conditions. Watering, feeding, managing crowded roots and hardening off turn fine green shoots into usable garden transplants.
This method is for bulb onions (Allium cepa), grown as individual plants rather than dense bunches of scallions.
Before filling the tray
Choose a variety suited to your latitude. In the U.S., that generally means long-day onions for northern gardens, short-day onions for southern gardens, and intermediate-day varieties where their adaptation ranges fit. Day length triggers bulb formation, so good seedling care cannot compensate for an unsuitable variety. Check the packet’s regional recommendations. Johnny’s Selected Seeds
Set your local planting-out window before sowing. For example, Minnesota Extension recommends starting onions 10–12 weeks before outdoor planting; mild-winter gardens need a different seasonal plan. Use our onion sowing-date guide rather than treating one month as a nationwide starting date. University of Minnesota Extension
Use fresh seed when possible. West Coast Seeds lists onion seed’s usual life as one year; older seed is worth testing before you commit your whole tray. That is a planning guide, not an automatic expiration date. West Coast Seeds
1. Sow in cells or an open flat
Gather a clean container with drainage holes, fine soilless seed-starting mix, labels and a gentle watering vessel. An open flat lets you raise seedlings together and separate them at planting time; cells keep their roots more contained.
- Premoisten the mix. It should hold together when squeezed without dripping water.
- Fill the container and sow. For individual transplants, Johnny’s specifies one seed per cell in a 128-cell tray. In an open flat, distribute seeds about ½ inch apart along shallow rows rather than pouring them into crowded piles.
- Cover with about ¼ inch of mix. This follows Johnny’s indoor onion method; use your packet if it specifies another depth.
- Water gently and label with the variety and sowing date. A humidity cover is optional, but check the seed layer daily for drying.
The moisture check and open-flat method come from Seed Savers Exchange; cell sowing and covering depth from Johnny’s; flat spacing from Botanical Interests. For choosing and preparing the medium, see seed-starting mix for onions.
2. Keep the seed layer moist and warm
For indoor germination, aim for a mix temperature around 70–75°F (21–24°C). West Coast Seeds gives that Fahrenheit range for its long-day onions and an emergence window of 6–12 days, depending on conditions. Measure the mix rather than assuming it matches room temperature. West Coast Seeds
Bottom heat can help in a cool room, but it is not essential. Keep the seed layer evenly moist—not soaked—and remove the humidity cover and germination heat once shoots emerge. Seed Savers Exchange
No shoots by two weeks? Check temperature, moisture, sowing depth and seed age before declaring failure. Iowa State’s indoor reference allows 4–20 days for onion emergence, so a slower tray is not automatically a lost tray. Iowa State University Extension
3. Grow the seedlings, not just their tops
Light and temperature: Move emerged seedlings under supplemental lighting; a window alone is often insufficient. A 12-hour light schedule is a cautious starting option, with lamp distance adjusted to the fixture’s instructions. In a Maryland Extension response, the expert suggests 10–12 hours while explicitly noting that evidence is insufficient to say longer artificial days cause small bulbs. This is not a proven optimum. Do not interpret the packet’s day-length category as its grow-light setting. Seed Savers Exchange; Maryland Extension response
After germination, a daytime room temperature around 65–70°F, with slightly cooler nights, is a useful seedling-growing target—not the warmer germination target. Iowa State University Extension
Water and airflow: Water when the surface begins drying and the tray feels lighter, before seedlings wilt. Bottom watering or a gentle overhead stream both work; discard drainage water. Provide gentle air circulation without a strong fan blast. Utah State University Extension
Feeding: Check whether the mix contains starter fertilizer; that charge may last only a few weeks. In an unfertilized mix, begin feeding when seedlings develop their first true leaves. Use a complete fertilizer at its labeled seedling dilution. If no seedling rate is given, Utah State recommends half the normal concentration once weekly. USU materials guide; USU seedling-care guide
Trimming and root space: If long tops begin toppling and tangling, clip them to roughly 4 inches to make handling easier. This is a height-management step, not a promise of larger bulbs. If roots form a thick mat before outdoor planting is possible, move seedlings into more space, gently teasing apart intertwined roots and replanting at the same depth. Seed Savers Exchange; Utah State University Extension
4. Harden off, separate and transplant
Begin hardening off about two weeks before planting. Start with a few hours outdoors in sheltered shade, then gradually increase sun and outdoor time. Keep trays watered and protect them from freezing during acclimation; hardening off does not mean deliberately exposing seedlings to severe cold. Utah State University Extension
Onion transplants tolerate light frost, but use your local onion planting window—not a tomato planting date. Choose a full-sun site with workable, well-drained soil. University of Minnesota Extension
On a cloudy day or in the morning:
- Moisten the tray, then lift seedlings with their roots supported rather than pulling hard on the tops.
- Separate flat-grown onions gently into individual plants. Push cell-grown root balls out from below.
- Plant shallowly. Keep intact plugs at their container level. For separated bare-root seedlings, Bonnie Plants recommends about 1 inch deep, covering the roots without burying the point where leaves separate from the sheath.
- Space individual plants 4–6 inches apart, with rows 12–18 inches apart, following Johnny’s transplant spacing.
- Firm lightly and water immediately to settle soil around the roots.
These handling and watering steps follow Utah State Extension, with bare-root depth from Bonnie Plants and spacing from Johnny’s.
Check moisture frequently while roots establish: newly planted seedlings may need watering more often than established onions. Keep the bed damp rather than soggy, and remove weeds while small, using shallow cultivation to avoid damaging onion roots. Utah State Extension; USU onion-growing guidance