
How to Plant Hosta Seeds: Depth and Warmth
Screen for dark, apparently filled seed, then sow on sterile damp mix with no more than 1/8 inch of cover. Keep near 75°F and wait beyond two weeks.
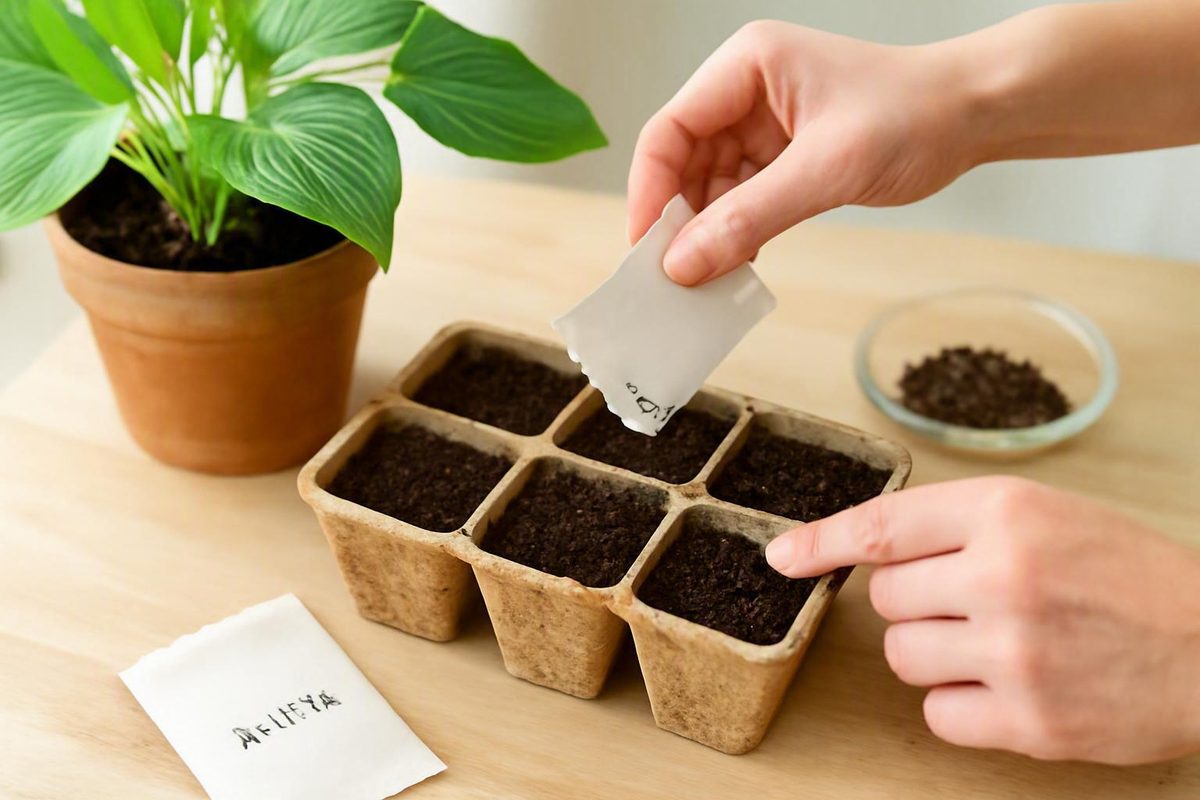
Growing hostas from seed is a slow but approachable project. The most controllable baseline is to select apparently filled seed, sow it on sterile premoistened mix, cover it only lightly, keep the medium warm and evenly damp, and provide strong light as soon as seedlings emerge.
That method is not a guarantee. Hosta seed lots can germinate unevenly, some seeds may never sprout, and young plants require extended care. Refrigeration, paper-towel germination, and direct outdoor sowing are alternatives worth testing, but none is established as necessary or superior for every batch.
The other essential expectation concerns genetics. A seedling is a new individual, not a clone of the hosta that carried its pod. That uncertainty is part of the appeal, but it matters if your goal is to reproduce a particular blue, gold, or variegated cultivar.
Before You Sow: Know What Growing Hostas From Seed Can—and Cannot—Do
Hostas can be grown from seed, but the seedlings should be treated as genetically variable offspring. Even when every seed comes from one named plant, those seedlings do not inherit the cultivar name automatically.
Expect many seedlings to be unremarkable or solid green. Variegated parents are especially unlikely to produce seedlings that reproduce the parent’s pattern. The Delaware Valley Hosta Society notes that very few hostas come true from seed, that seed from variegated plants almost never produces matching variegated offspring, and that not every hosta produces viable seed. Its hosta hybridizing FAQ explains these genetic and fertility limitations.
That does not make growing hostas from seed pointless. It makes seed a different kind of propagation.
Seed is appropriate when you want to:
- Grow a group of genetically individual hostas.
- Explore natural variation.
- Make and evaluate controlled crosses.
- Practice seed collection and seedling selection.
- Enjoy the possibility—without the promise—of finding an interesting plant.
Seed is inappropriate when you need an identical copy of a favorite named hosta. Division preserves an existing plant by physically separating part of it. Commercial growers may also use tissue culture to reproduce named selections. Those are cloning routes; seed is not.
This distinction affects labeling. Record the named plant that produced the pod as the pod parent, but do not give its cultivar name to the seedlings. A label such as “seedling from Hosta ‘Example’” or “‘Example’ seedling” preserves useful parentage information without claiming that the offspring is the cultivar itself. If you deliberately transferred pollen from another plant, record both parents.
Plan for uneven emergence and losses. Sow more apparently filled seeds than the final number of plants you want, but do not rely on a universal germination percentage. Results vary with fertility, pollination, harvest maturity, storage, handling, and growing conditions.
There are three practical sowing routes:
- Indoor sowing in mix offers the greatest control over warmth, moisture, sanitation, and light.
- Paper-towel germination makes sprouting visible but requires delicate transfer of tiny roots.
- Direct outdoor sowing reduces indoor work while exposing seeds to fluctuating moisture, weather, animals, and weed competition.
For a beginner learning how to plant hosta seeds, indoor sowing in sterile mix is the conservative place to start.
Collect, Clean, and Screen Hosta Seeds Before Planting
Successfully pollinated hosta flowers can develop elongated pods. As the seeds mature, the pods begin to yellow or brown, dry, and eventually split. Collect them before they open fully and scatter their contents.
The Delaware Valley Hosta Society uses approximately six to eight weeks after pollination as a working estimate for pod ripening, followed by yellowing, drying, and splitting. This is an observational guide rather than a deadline for every cultivar and climate. The society’s collection guidance also recommends harvesting before pods split or enclosing them in mesh bags.
Harvest descriptions can appear to conflict. Some growers wait for brown, dry pods, while others collect dark, papery seed from pods that remain partly green. The useful common ground is seed maturity: look for a dark seed with a papery wing and a pod that is visibly aging or drying. The pod does not necessarily have to become uniformly brown before mature seed can be collected.
If a pod is nearing maturity but cannot be checked daily, place a fine mesh bag around it to catch released seed. Otherwise, clip it into a labeled paper bag and let it finish drying in a cool, dry place.
What a filled hosta seed looks like
The conspicuous portion of a hosta seed is a thin, dark, papery wing. An apparently filled seed has a discernible kernel or firm nodule attached to or within that wing. An empty wing feels flat and insubstantial.
This inspection is a screening method, not a viability test. A seed can contain a kernel yet still be immature, sterile, damaged, decayed, or unable to germinate.
Separate obviously empty wings and material showing decay. If the pods or seeds are freshly opened, allow them to dry briefly in a cool place before packaging or sowing. Do not enclose visibly damp material for storage.
Label each batch with:
- Pod parent.
- Harvest date.
- Known pollen parent, if a controlled cross was made.
- Storage or refrigeration treatment.
- Observations about pod maturity or seed fill.
Cool, labeled storage is a documented grower practice, but the available evidence does not establish a dependable storage life. Do not assume that hosta seed will remain viable for a particular number of months or years under all storage conditions. If a batch is valuable, sowing part of it while reasonably fresh avoids staking the entire project on uncertain longevity.
Not every flower forms a pod, not every pod contains filled seed, and not every hosta is equally fertile. Pollination, cultivar fertility, weather, pod development, and harvest timing can all affect what you collect. A poor batch therefore does not necessarily mean your later sowing method was wrong.
Before sowing, check that:
- The seed is dark and papery rather than pale and undeveloped.
- A kernel or firm nodule can be seen or felt.
- There is no obvious decay.
- The batch is labeled.
- You have enough seed to accommodate variable germination and seedling losses.
The Baseline Setup: Supplies, Timing, and Conditions
Assemble the setup before opening a packet or scattering cleaned seed. Hosta seeds are small enough that improvised watering, missing labels, or blocked drainage can create avoidable problems.
You will need:
- Apparently filled hosta seeds.
- Waterproof labels and a suitable marker.
- Clean pots, cell trays, or other containers with drainage holes.
- Sterile seed-starting mix.
- A waterproof tray.
- A clear humidity dome, lid, or loose plastic covering.
- A mister or another gentle watering tool.
- A dependable light source for emerged seedlings.
- Optional bottom heat if the growing area is cool.
- A notebook or digital record for dates and observations.
Choose containers deep enough to hold a modest volume of mix and developing roots. There is no universally necessary container size or seed-per-pot density. Very shallow quantities of mix can dry quickly, while a large container holding poorly aerated mix may be difficult to keep evenly moist. Use a manageable container and make open drainage non-negotiable.
Sterile seed-starting mix is preferable to garden soil. It provides a fine, relatively clean, well-draining medium around small seeds and reduces avoidable exposure to weed seeds and organisms associated with seedling losses.
Premoisten the mix before filling the pots. Add water gradually and mix thoroughly until it feels like a wrung-out sponge: damp throughout and able to hold together lightly when squeezed, but not dripping or releasing free water.
A practical temperature target is approximately 75°F, within the 70–80°F range repeatedly used in grower guidance. Treat this as a working range rather than a proven optimum for every hosta seed lot. The Hosta Library’s specialist growing account reports using warm conditions in this range while emphasizing drainage, sterile mix, and variable results.
Avoid placing containers against cold glass or directly over a radiator that produces sharp fluctuations. Optional bottom heat can help in a cool room, but it should not cause the mix to dry rapidly.
Timing should be based on indoor capacity and local frost risk rather than a universal calendar date. Work backward from the period when frost risk is normally past, then allow time for germination, leaf and root development, potting on, and gradual hardening.
Starting in autumn or very early winter can create a long growing period, but it may also leave you maintaining increasingly large plants indoors for many months. An early start is useful only if you have sufficient light, space, and time. Starting later may be more manageable even if the plants are smaller in spring.
If you want to test refrigeration, divide and label the seed before treatment. Keep the refrigerated and untreated groups separate. A comparison is meaningful only if the groups are later sown at the same depth in the same mix and receive similar warmth, moisture, and light.
For broader context on drainage, lighting, moisture management, and acclimating indoor-grown plants, see this guide to indoor seed-starting fundamentals.
How to Plant Hosta Seeds Indoors, Step by Step
Indoor sowing in seed-starting mix is the conservative baseline because it lets you control the variables most likely to affect a small seed: cleanliness, moisture, warmth, sowing depth, and post-emergence light.
1. Prepare and label the container
Wash away old soil and debris, and confirm that every drainage hole is open.
Fill the container with premoistened sterile seed-starting mix. Settle it gently without compressing it into a hard mass. Leave enough room at the top for watering and a light covering.
Label the container before sowing. Include the seed lot, parentage if known, sowing date, and any treatment such as refrigeration. Early labeling prevents confusion when several pots begin to look alike.
2. Distribute the seeds
Place the seeds across the surface with enough separation to see individual sprouts and later lift seedlings or small groups. They do not need to be arranged with mechanical precision, but avoid dropping the entire batch into one tight pile.
Appropriate density depends on container size, the amount of seed available, and how soon you intend to transplant. Crowded sowing saves space initially but makes observation, airflow, and root separation more difficult later.
3. Make contact and cover lightly
Press the seeds gently against the damp surface. Either leave them surface-sown or apply a very fine covering of mix, vermiculite, or another suitable fine material. Do not exceed approximately 1/8 inch.
Some older individual grower instructions use a covering near 1/4 inch, but that conflicts with the more conservative surface-to-1/8-inch range. For small hosta seeds, the shallower approach is the better-supported baseline. Outdoor specialist guidance likewise advises surface sowing or a covering of about 1/8 inch. That guidance explains the shallow depth and gentle seed-to-soil contact.
Good contact matters more than burying the seed deeply. Press gently without compacting the whole surface.
4. Water without displacing the seed
Mist the surface or use a very gentle flow.
Allow excess water to drain. Do not leave the container standing indefinitely in a full tray of water.
Bottom-watering is useful when the mix begins to need moisture. Add a shallow amount of water to the tray and let the medium absorb it through the drainage holes. Once the mix is evenly damp, remove the pot and drain away the remaining water. The aim is to rehydrate the medium, not maintain a permanent reservoir.
5. Add a clear cover
Place a clear dome, lid, or loose plastic covering over the container to slow evaporation. The cover should stabilize moisture, not seal saturated mix indefinitely.
Inspect the container regularly. A light haze or occasional droplets are unsurprising.
6. Maintain warmth and even moisture
Keep the seed zone within the practical 70–80°F range, with about 75°F as a useful target. Check the medium rather than watering automatically on a fixed daily schedule.
Use visible and physical moisture cues:
- Correct: The mix is evenly dark and damp but retains its structure.
- Getting dry: The surface lightens and the container feels noticeably lighter.
- Too wet: The surface remains glossy, water pools, or the mix appears muddy.
- Poorly ventilated: Heavy condensation persists, or stale odors and surface growth appear.
Do not let the entire seed zone dry out, but do not confuse “evenly moist” with continuously saturated.
The available evidence does not settle whether hosta seeds require light during germination. Some specialist guidance says light is unnecessary, while shallow outdoor protocols leave seeds exposed or barely covered. Do not make either complete darkness or continuous light a rigid prerequisite. Instead, maintain warmth and moisture and have strong seedling lighting ready before the first shoots appear.
From First Sprout to Established Seedling
First emergence is not the same as completed germination. Under suitable conditions, the earliest hosta seedlings are often reported after roughly 10–21 days, but other seeds in the same batch may emerge several weeks later. Specialist grower records include starts near 10 days as well as batches requiring three to four weeks. The Hosta Library account documents this variable emergence rather than a guaranteed deadline.
Do not discard a tray merely because nothing has happened by day 14. Use four to six weeks as a checkpoint for reviewing conditions, not as an absolute failure date. One personal growing account documented emergence from just over two weeks to two or three months after refrigerated seed was planted, illustrating how prolonged and uneven an anecdotal batch can be. That grower’s record provides the extended emergence example.
When the first shoots appear, begin changing the environment from a germination chamber to a seedling-growing space.
Vent or remove the humidity cover
Begin venting the cover as seedlings emerge, then remove it as the tray establishes.
Do not compensate for removing the dome by flooding the pot. Newly emerged seedlings still require even moisture, but drainage and air around their roots remain important.
Provide strong light promptly
Move seedlings beneath a dependable grow light or into another genuinely bright setup. A dim, one-sided windowsill can encourage pale, leaning, elongated growth.
One practical hosta guide recommends approximately 12–14 hours of bright indirect light or grow-light illumination each day. Treat that duration as operational guidance rather than a controlled hosta-specific optimum; continuous lighting is not established as necessary. The same guide describes the suggested photoperiod and post-emergence lighting conditions.
Watch the plants rather than relying only on the clock. Seedlings that stretch, lean sharply, or become pale may need stronger or more evenly distributed light.
Continue careful watering
Maintain moisture through the root zone without keeping the surface permanently wet. Bottom-water where practical, then empty excess water from the tray.
Small seedlings have little tolerance for complete drying. At the same time, continuously saturated mix restricts healthy root-zone conditions and is associated with mold and seedling collapse. Aim for damp, aerated mix.
Wait for leaves and roots before separating
A hosta’s first emerging leaf is only the beginning. Allow additional leaves and roots to form before separating crowded seedlings.
The supplied sources use several leaf-based cues. Some growers move seedlings after they develop a set of leaves, some thin around two or three true leaves, and others wait until four to six leaves for later care steps. These are practitioner ranges, not a universal rule.
Use a combination of cues:
- Several leaves have developed.
- The seedling is actively growing.
- Roots occupy or hold together its portion of mix.
- Neighboring seedlings are beginning to compete for space.
If seedlings are exceptionally crowded, earlier thinning may reduce competition. If they have room and remain healthy, waiting for stronger roots can make handling easier.
Fertilizer advice is similarly variable. One specialist FAQ begins weak water-soluble fertilizer after seedlings reach four to six leaves, while another article suggests diluted fertilizer after four to six weeks. Neither establishes a universal concentration. Do not use fertilizer as a response to waterlogged roots, inadequate light, or damaged plants.
Keep records of:
- Sowing date.
- First emergence.
- Later emergence dates.
- Number of established seedlings.
- Losses after emergence.
- Potting dates.
- Differences among seed lots or treatments.
These notes help distinguish a slow batch from a failed technique and make a refrigeration comparison more informative.
Optional Alternatives: Refrigeration, Paper Towels, and Outdoor Sowing
Refrigeration, paper towels, and outdoor sowing can all be tried, but each changes the balance of control, labor, and risk. None is established as universally superior.
Optional refrigeration
The available evidence does not establish cold stratification as mandatory for hosta seed. Some growers report germination without chilling, while others report earlier or improved results after moist refrigeration. Much of this evidence comes from individual grower experience rather than controlled comparisons.
If you have enough seed, conduct a split-batch experiment:
- Divide one seed lot into two reasonably comparable groups.
- Place one group in a damp—not dripping—paper towel or another moist medium.
- Seal and refrigerate it for about four weeks.
- Keep the comparison group untreated and clearly labeled.
- Sow both groups on the same day in identical containers and mix.
- Give them the same warmth, moisture, and post-emergence light.
- Record first emergence, later emergence, and seedling survival.
The roughly four-week treatment is an optional practitioner method, not a universal requirement. One grower reported success after refrigerating seed for several weeks but also recorded comments from others who germinated seed without refrigeration. The account illustrates why chilling is best treated as a test rather than a rule.
Screen the batch before investing time in treatment.
Paper-towel pre-germination
Paper towels let you see which seeds have begun to germinate.
To try the method:
- Moisten two plain paper towels and squeeze out excess water.
- Arrange the seeds between the damp layers.
- Place the towels in a sealed bag.
- Keep the bag warm.
- Begin checking after about two to three weeks.
- Transfer sprouted seeds before their roots become long, branched, or tangled in the fibers.
Prepare the receiving pot before opening the bag. Set the sprouted seed onto premoistened mix, place the root in contact with the medium, and cover only enough to stabilize it.
The main advantage is visibility. The disadvantage is handling: a seed that could have rooted undisturbed in mix must instead be lifted, oriented, and replanted at a delicate stage. Sienna Hosta describes checking warm, bagged damp towels after two to three weeks and transferring sprouts to trays, while also noting that seed propagation is time-consuming and can involve substantial losses. Its nursery guide outlines the process and limitations.
No supplied controlled comparison proves that paper towels are more reliable than direct sowing in mix. Use them when visible sprouting is worth the additional transfer risk.
Direct outdoor sowing
Outdoor sowing reduces indoor equipment but gives up environmental control.
Choose a site with partial to full shade, moist but well-drained soil, and protection from hot afternoon sun. Remove weeds and grass, then loosen the upper soil and break up large clods.
If the soil is dry, water before sowing. Scatter the seeds across the moist surface and press them gently into contact. Leave them exposed or add no more than a dusting—approximately 1/8 inch—of fine material.
Water with a mist or very gentle spray. Keep the seed zone evenly damp rather than muddy. Mesh or another secured physical cover can reduce losses to birds or heavy rain, provided it does not obstruct emerging seedlings.
Late spring after frost risk has passed and early fall are both documented outdoor options. The better choice depends on regional heat, rainfall, winter severity, and your ability to maintain moisture. The outdoor hosta-seed guidance describes these seasonal options, the shaded site, shallow depth, and physical protection.
Outdoor losses can result from:
- Drying soil.
- Heavy or prolonged rain.
- Temperature fluctuations.
- Soil crusting.
- Slugs.
- Birds.
- Squirrels and other digging animals.
- Weed competition.
- Seedlings being mistaken for weeds.
Direct sowing is therefore simpler in equipment, not necessarily simpler in outcome.
Potting On, Hardening Off, and Moving Hostas Into the Garden
Separate seedlings when they have several leaves and enough roots to occupy or hold together their portion of mix.
Prepare the new pot before disturbing the original container. Add suitable premoistened mix and make a planting hole. Loosen the seedling tray gently from an edge rather than pulling seedlings upward from compacted medium.
Support each seedling by its root ball or surrounding mix. Avoid pinching the tender stem. If roots have intertwined, tease them apart slowly rather than stripping away every particle of old mix.
Replant at approximately the same level at which the seedling was growing. Firm the surrounding mix lightly to establish root contact, water gently, and let the container drain.
Move established seedlings into small individual pots rather than automatically placing them in very large containers. Repot again when roots occupy the available space or when the plant can no longer be watered evenly. No one pot size is correct for every seedling, mix, and growing period.
After potting:
- Return seedlings to strong, even light.
- Keep the mix evenly moist.
- Avoid saturating recently disturbed roots.
- Protect the plants from intense direct sun while they recover.
- Watch for renewed growth before making further changes.
Do not assume that a stalled transplant immediately needs fertilizer. First inspect moisture, drainage, root condition, temperature, and light.
Harden seedlings gradually
Begin hardening off roughly two weeks before the intended garden transplant date as a practical planning guide. The exact duration can vary with weather and the degree of shelter the plants received indoors. One hosta planting guide recommends this two-week transition with progressively longer outdoor exposure.
Start with a short period outdoors in sheltered shade. Bring the plants back into protection before conditions become cold, windy, or intensely sunny. Extend their outdoor time gradually on suitable days.
Hardening is an acclimation process, not a test of how much exposure they can survive in one day.
Transplant after local frost risk has passed and conditions are suitable for tender indoor-grown seedlings. Do not rely on one universal overnight-temperature threshold. Forecasts, soil conditions, seedling size, and the protection available in your garden all matter.
Choose a permanent or nursery location with partial to full shade, moist but well-drained soil, and shelter from hot afternoon sun. Water after planting and monitor the small root zone while the plant establishes.
The available sources do not establish a universal timeline for flowering, mature size, or final leaf character. Seed-grown hostas require patience, and development varies with genetics and conditions.
The evidence also does not support one first-winter protection formula for every climate. Consider planting date, seedling size, drainage, snow cover, freeze-thaw patterns, and established local gardening practice when deciding whether small first-year plants need extra protection.
Troubleshooting Poor Germination, Mold, Collapse, and Weak Growth
Approach problems by identifying the visible symptom and correcting the environment before adding treatments. Clean materials, open drainage, controlled moisture, airflow, suitable warmth, strong post-emergence light, and patience are the core tools.
| Symptom | Likely considerations | Practical response |
|---|---|---|
| No germination after two weeks | The batch may simply be slow. The medium may be too cool, moisture may be uneven, or some wings may be empty. | Do not discard the pot. Check warmth, confirm that the seed zone remains evenly damp, and inspect unsown seed for a kernel or firm nodule. |
| No germination after three to six weeks | The mix may have dried repeatedly, remained saturated, stayed too cool, or developed decay. Seed may also be immature, sterile, damaged, or otherwise nonviable. | Reassess the full setup. Continue waiting if the medium remains sound because no definitive failure date is established. Start a comparison batch if apparently filled seed remains. |
| White or gray surface growth | Prolonged enclosure, stagnant air, organic debris, saturated mix, or contaminated materials can contribute. | Vent or remove the cover, improve airflow, remove standing water, and allow the surface to move from wet toward evenly damp. Use clean containers and sterile mix for later batches. |
| Seedlings collapse at the soil line | The symptom is consistent with damping-off or root-zone failure, although appearance alone does not confirm a diagnosis. Persistent wetness, poor drainage, crowding, and contaminated materials are possible contributors. | Remove collapsed seedlings, improve airflow, reduce prolonged surface wetness, and bottom-water where practical. Do not leave pots standing in water. Restart severe losses with clean containers and sterile mix. |
| Pale, stretched, leaning seedlings | Post-emergence light may be too weak or come from only one direction. Excessive warmth can compound stretching. | Move seedlings under stronger, more even light. Rotating containers may help, but it does not make a dim windowsill adequate. |
| Growth stalls | Roots may be waterlogged, dry, crowded, damaged during transplanting, or confined in unsuitable mix. Light may be inadequate. | Inspect drainage and roots, confirm even moisture, improve light, and separate crowded seedlings when they are strong enough. Correct the environment before adding fertilizer. |
| Outdoor seeds or seedlings disappear | Birds, slugs, squirrels, heavy rain, drying, or accidental weeding may be responsible. | Use mesh or another physical barrier, water gently, maintain shade, mark the seedbed, and consider protected or elevated trays. Make sure covers do not obstruct emerging plants. |
At two weeks, patience is generally more useful than digging through the pot.
By three to six weeks, conduct a structured check:
- Has the mix dried completely?
- Has it remained muddy or glossy?
- Is the seed zone near the intended temperature?
- Are the drainage holes open?
- Is there a sour odor, decay, or heavy surface growth?
- Did the original seed contain a visible or palpable kernel?
- Was the batch collected mature and stored dry?
- Are other seed lots germinating in the same setup?
Complete failure is not always a technique failure. Empty, immature, sterile, decayed, or poorly stored seed cannot be rescued through perfect watering. A community discussion of failed hosta sowings raises these seed-quality explanations and also illustrates the range of anecdotal temperature and germination results. The discussion is useful as a record of conflicting experiences, not as proof of one universal method.
For mold or collapsed seedlings, prioritize sanitation, drainage, airflow, and moderated moisture. Older grower accounts sometimes mention pesticides, fungicides, bleach, or microwaved soil, but the supplied evidence does not provide current label, exposure, legal, or environmental guidance sufficient to recommend those practices. A clean restart is the safer baseline.
Use this reset checklist:
- Fresh or reasonably handled, apparently filled seed.
- A clean container with unobstructed drainage.
- Sterile, fine seed-starting mix.
- Mix premoistened to the feel of a wrung-out sponge.
- Surface sowing to no more than about 1/8 inch deep.
- A practical germination target near 75°F.
- Even moisture without standing water.
- Patience beyond the first two weeks.
- Cover removal or ventilation after emergence.
- Strong light for seedlings.
- Written records for later comparison.
Frequently Asked Questions
Do hosta seeds need cold stratification before planting?
No supplied evidence establishes cold stratification as mandatory. Some growers report germination without chilling, while others report better or earlier results after refrigeration.
If you have enough seed, refrigerate half in a damp medium for about four weeks and leave the other half untreated. Sow both groups under otherwise similar conditions and compare first emergence, later emergence, and survival. Forum participants report success both with and without cold treatment, which supports treating refrigeration as an experiment rather than a requirement. The discussion records those differing grower experiences.
Refrigeration will not repair empty, immature, sterile, damaged, or decayed seed.
How long do hosta seeds take to germinate?
First emergence is commonly reported in roughly 10–21 days under warm, evenly moist conditions, but germination can be staggered. Other seeds in the same batch may emerge several weeks later.
Do not declare failure after two weeks. Reassess conditions around four to six weeks while recognizing that individual grower accounts have documented substantially later sprouts. There is no defensible universal deadline for every seed lot.
Do hosta seeds need light to germinate?
The available guidance conflicts, so neither light nor darkness should be treated as a rigid germination requirement. Surface sowing or a very shallow covering is a practical baseline that also avoids placing a large barrier over the seed.
What is operationally clear is that seedlings need strong light promptly after emergence. Have the light source ready before sowing so the first shoots do not remain in dim conditions.
Can I plant hosta seeds directly in the ground?
Yes. Prepare a weed-free location in partial to full shade with moist but well-drained soil. Press the seed onto the damp surface and leave it exposed or apply only a light dusting of fine material.
Water gently and consider mesh protection against birds and heavy rain. Direct sowing reduces indoor work but exposes seed to drying, rainfall, temperature changes, slugs, squirrels, birds, weeds, and accidental disturbance.
Will seeds from a blue or variegated hosta produce the same cultivar?
Usually not. Seedlings are genetically distinct and should not be expected to reproduce the parent’s blue or gold coloring, pattern, or variegation. Many seed-grown hostas are reported to be plain or solid green. Sienna Hosta explains why nursery-grown cultivars do not come true from seed.
Label the offspring as seedlings from the named pod parent rather than giving them the cultivar name. If you need an identical copy, divide the named hosta or obtain a correctly identified clonally propagated plant.
The practical route is straightforward even when the outcome is variable: screen for dark, apparently filled seed; sow on sterile damp mix with no more than about 1/8 inch of cover; maintain a working temperature near 75°F and even moisture; and wait beyond the first two weeks for uneven emergence. Once shoots appear, vent or remove the cover and provide strong light. Pot seedlings on after they develop several leaves and useful roots, then harden them gradually before planting outdoors.
Refrigeration and paper towels remain optional experiments, not requirements. The reward is a group of genetically individual hostas—not guaranteed copies of a named parent.