A No-Guesswork Method for Growing Potatoes in Buckets and Grow Bags
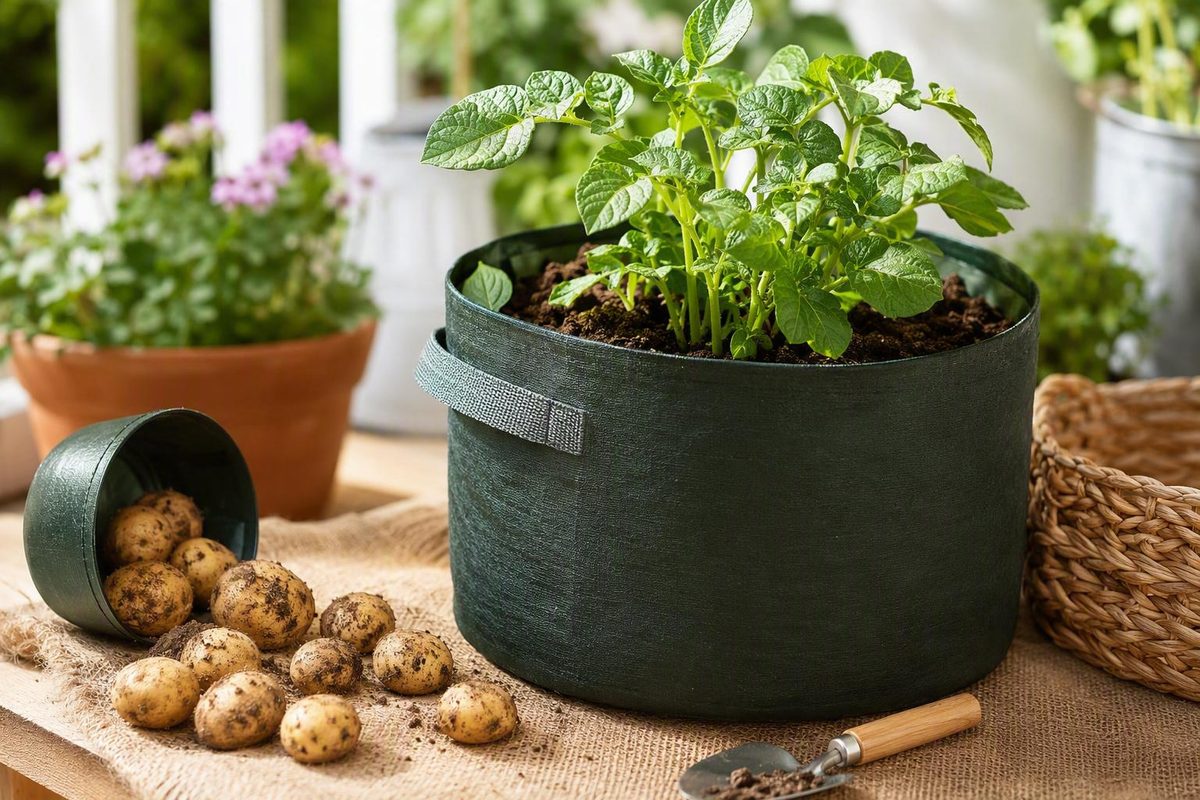
Growing potatoes in a container does not require a special tower or a complicated feeding schedule. A practical beginner method is to give a conservative number of seed pieces enough room, use loose growing medium, provide unobstructed drainage, keep developing tubers covered, and water according to the condition of the mix.
The method below works as a starting point for buckets, large pots, tubs, and fabric grow bags. Published guidance differs on planting density and whether containers should be filled gradually, so those choices are presented as options rather than universal rules.
The quick answer: a conservative container-potato recipe
For a straightforward first planting, gather:
- Certified seed potatoes
- An opaque, well-drained container holding approximately 10–15 gallons
- A container depth of at least about 14 inches
- Loose soilless potting mix
- Mature compost
- A balanced or lower-nitrogen fertilizer if the mix contains no fertilizer
- A watering can or hose with a gentle flow
- A plant label
- A sunny growing position
Use approximately one seed piece per five gallons of container capacity as a conservative planning baseline. That means about two pieces in a 10-gallon container or three in a 15-gallon container. This deliberately uncrowded approach is not a universal optimum; published recommendations vary substantially by source and container system. The container size, depth, planting density, and growing-medium recommendations above follow the conservative method described by The Old Farmer’s Almanac.
Plant as follows:
- Confirm that water can drain freely through the bottom of the container.
- Blend loose potting mix with mature compost.
- Add 4–6 inches of damp medium to the bottom.
- Arrange the seed pieces apart from one another, with obvious eyes or short sprouts pointing upward.
- Cover them with approximately 2–4 inches of medium.
- Water thoroughly until excess water drains from the bottom.
- Leave enough empty space for later additions of medium and for watering without washing mix over the rim.
Plant according to local conditions rather than a universal calendar date. A practical lower range is a growing-medium temperature of approximately 40–45°F, provided you can protect foliage that emerges while frost remains possible. Published thresholds differ slightly, but cold, wet medium and exposed shoots are more important considerations than a date intended for another region. Homestead and Chill gives 40°F as a planting threshold, while other supplied guidance uses 45°F (planting-temperature guidance).
After planting, provide approximately 6–8 hours of sunlight in moderate weather. Check moisture by touch instead of watering on a fixed schedule. As stems grow, add medium around their lower portions while leaving healthy upper foliage exposed. Keep frost protection available until the local risk has passed.
Choose a container that provides room and drainage
A useful beginner container is opaque, at least about 14 inches deep, and large enough to hold roughly 10–15 gallons of growing medium. Opacity keeps light away from the crop, while effective drainage prevents water from remaining trapped in the bottom of a large volume of mix.
There is no single best shape. What matters is usable growing volume, adequate depth, stability, and drainage.
Use this chart as a conservative planning baseline:
| Container capacity | Conservative number of seed pieces |
|---|---|
| 5 gallons | 1 |
| 10 gallons | 2 |
| 15 gallons | 3 |
| 20 gallons | 4 |
The chart is derived from approximately five gallons of growing-medium volume per plant. It is a planning tool, not a proven optimum for every cultivar, climate, container shape, or growing medium (container-volume guidance).
Other guides recommend denser planting. One garden-center guide allows one or two pieces in a 5-gallon bucket and two to three in a 10- to 15-gallon grow bag. That variation is why no single planting density should be presented as universally correct (bucket and grow-bag density guidance).
Closer planting puts more stems and root systems into a fixed volume. No capacity chart can promise a particular number, size, or weight of potatoes.
Container materials also affect day-to-day management:
- Large tubs and trash cans can work when they are opaque and well drained, but they become heavy when filled and may be difficult to water evenly.
- Decorative pots are suitable only when their depth, capacity, stability, and drainage are adequate.
If you repurpose a rigid bucket or tub, create ample drainage across the bottom. There is no supported universal number or diameter of holes for every vessel. The practical test is whether water can escape from multiple points instead of collecting in the base.
Do not put rocks or broken pottery in the bottom as a substitute for drainage openings. The openings themselves must remain unobstructed.
Position the empty container where the crop will grow, or fill it nearby. A large container holding damp mix becomes difficult to move. If you expect to relocate it for frost or heat protection, choose a size and design you can handle safely.
Used tires are not included among the routine recommendations here. The supplied evidence does not establish them as a straightforward choice for growing food, whereas purpose-made grow bags, nursery pots, buckets, and suitable tubs provide simpler alternatives.
Prepare seed potatoes and decide when to plant
A seed potato is a potato tuber produced for planting, not a true botanical seed. The small dimples called eyes are growth points from which shoots can emerge.
Certified seed potatoes are the lower-risk choice. Grocery-store potatoes may carry pathogens, and some may have been treated to discourage sprouting. Certification does not guarantee a successful or disease-free crop, but planting stock produced for cultivation is a more controlled starting point.
A sprouted grocery potato can grow, so it is inaccurate to say that supermarket potatoes never work. Treat one as a fallback rather than the lowest-risk option, especially if you intend to reuse the growing medium or plant potatoes and related crops in the same area in later seasons.
Prepare the tubers according to size:
- Plant a small, approximately egg-sized seed potato whole.
- Cut a larger tuber into pieces with at least one or two healthy eyes on each piece.
- Reject pieces that are soft, moldy, badly shriveled, or actively decaying.
- Let fresh cut surfaces dry for about one or two days before planting.
The one-to-two-day drying period and the recommendation to retain at least one or two eyes are supported by the Greensboro container-potato guide. Other sources recommend longer drying periods, so the goal is a dry cut surface rather than a rigid universal countdown (seed-piece preparation guidance).
Chitting is optional. It means encouraging sprouts before planting and may be useful in a cool or short growing season. Put the seed potatoes in a cool, bright, frost-free location and, when the eye-rich end is obvious, face it upward. Aim for short, sturdy sprouts rather than long, pale growth. Unchitted seed potatoes can also be planted.
Planting time requires two separate checks:
- Is the growing medium warm enough? Approximately 40–45°F is a practical lower range across the supplied guidance.
- Can new foliage be protected from frost? A buried tuber may remain insulated while leaves above the surface are damaged.
A sheltered patio, an exposed garden, and an unheated greenhouse can reach suitable conditions at different times, even within the same region. Smart Pot advises waiting until the medium reaches at least 45°F, while also noting that variety and local temperature conditions affect the crop (temperature and seasonal guidance).
If you plant while frost remains possible, keep a suitable plant cover available or use a container that can be moved temporarily into shelter. The purpose is to protect exposed growth during a cold event, not to force the crop in a permanently warm indoor environment.
Build a loose growing mix and choose the right location
A practical general-purpose medium is a blend of loose soilless potting mix and mature compost. The finished blend should feel friable rather than sticky or dense.
Avoid filling the container with garden soil alone. Soil that performs adequately in an open bed can compact after repeated watering in a pot.
A suitable medium should:
- Retain some moisture after watering
- Release excess water through the bottom
- Break apart easily in the hand
- Avoid forming hard, heavy clods
- Remain loose enough for roots and tubers to expand
- Settle without collapsing into a dense mass
Do not use fresh manure. Be cautious with large amounts of high-nitrogen amendments as well. Potatoes need nutrients, but excessive nitrogen can encourage abundant leaves and stems without a corresponding improvement in tuber development. The recommended combination of soilless mix and well-rotted compost—and the warnings against garden soil, fresh manure, and excessive nitrogen—are included in the Almanac’s container method.
Published recommendations disagree on an exact pH, ranging from strongly acidic values to around 6.0. Unless you have tested the medium and have a specific reason to amend it, prioritize a commercially prepared, free-draining mix rather than chasing one supposedly universal pH number.
Place the container where the foliage can receive approximately 6–8 hours of sunlight under moderate conditions. In a climate with prolonged extreme heat, afternoon shade may help reduce stress. Homestead and Chill recommends full sun in cool conditions and afternoon shade where summers are very hot (light and location guidance).
Before filling the container, inspect the site beneath it:
- Drainage water needs somewhere to go.
- Bottom openings must remain unobstructed.
- A saucer should not remain filled with water.
- The container should stand securely.
- Runoff should not create a hazard or damage the surrounding area.
Supports beneath a rigid pot can help keep existing outlets clear, but they do not replace drainage holes.
Plant the potatoes step by step
Once the container, seed pieces, medium, and location are ready, planting is straightforward.
1. Moisten the growing medium. The mix should be evenly damp but not dripping. This makes it easier to distribute and reduces the amount of settling after the first watering.
2. Add the bottom layer. Place 4–6 inches of loose medium in the container. Level it gently without pressing it into a hard layer.
3. Arrange the seed pieces. Use the conservative count for the container’s capacity. Distribute the pieces evenly, keeping them apart and away from the container wall rather than clustering them in the center.
4. Point visible sprouts upward. Position obvious eyes or short sprouts toward the top. A healthy piece does not need to be discarded merely because its orientation is unclear; upward placement simply gives visible shoots a direct path toward the surface.
5. Cover the pieces. Add approximately 2–4 inches of medium. Spread it loosely and avoid heavy compression.
6. Water thoroughly. Apply water slowly across the surface until excess begins leaving through the drainage openings. This settles the mix around the seed pieces and confirms that drainage is functioning.
7. Preserve headroom. Leave several inches below the rim for watering. Leave substantially more room if you plan to add medium gradually as the stems grow.
The 4–6-inch starting layer and approximately 3–4-inch cover are consistent with published container-potato instructions; some sources use a slightly shallower 2-inch cover. These figures should therefore be treated as a practical range rather than a precision requirement.
Worked example: a 10-gallon bucket
For a well-drained 10-gallon bucket:
- Add 4–6 inches of damp mix.
- Place two seed pieces apart from one another and away from the wall.
- Point visible sprouts upward.
- Cover with 2–4 inches of mix.
- Water evenly until drainage appears.
- Leave enough unfilled depth for later additions.
Two pieces are a conservative count. A denser arrangement is possible, but it gives each plant less container volume and may require closer attention to moisture and fertility.
Worked example: a 15-gallon grow bag
For a 15-gallon fabric bag:
- Set the bag in its growing position.
- Shape the base so the bag stands securely.
- Add 4–6 inches of damp mix.
- Space three seed pieces across the surface.
- Cover with 2–4 inches of mix.
- Water slowly and check that drainage is reasonably even.
Three pieces follow the conservative capacity baseline. Expect to inspect the moisture more often than you would in a rigid plastic pot because fabric containers generally release water more readily.
Record what you planted
Add a label and record:
- Variety
- Planting date
- Number of seed pieces
- Whether the pieces were whole or cut
- Whether they were chitted
- Date of the initial watering
These notes can help explain differences in emergence and harvest timing. They are also useful when deciding next season whether the container was crowded or the planting date was appropriate.
Care for the plants: filling, watering, feeding, sun, and weather
The standard beginner method is to add growing medium gradually. When the shoots are approximately 6–8 inches tall, add loose mix around the lower stems while keeping the active upper leaves exposed. Repeat as the plants grow until the container is nearly full, retaining some space below the rim for watering.
Do not bury every leaf. The plant needs exposed, healthy foliage. Add medium around the lower stems while leaving the growing tips and upper leaves in the light.
The clearest purpose of adding medium is to keep developing tubers covered. Inspect the surface after watering or heavy rain and replace medium wherever a tuber becomes visible.
Repeated filling should not be presented as a guarantee of more potatoes. Tall towers and deep burial do not automatically produce a larger crop. Container volume, variety, temperature, light, moisture, and plant health all influence the result.
There is also a legitimate alternative: filling most of the container at planting. Byther Farm describes using that method successfully rather than adding compost in stages. This is experience-based guidance, not evidence that one method is universally superior. Gradual filling remains a useful beginner default because it makes emergence easy to monitor and allows developing tubers to be covered as the plant grows (full-container method).
Water according to the mix, not the calendar
Push a finger into the top 1–2 inches of medium. If that layer feels dry, water slowly across the surface until excess drains from the bottom. If it remains moist, check again later instead of watering automatically. Published container guidance similarly recommends watering when roughly the top 2 inches are dry (moisture-test guidance).
This test is more useful than a fixed schedule because demand changes with the weather, the plant’s size, and the container:
- Fabric bags may need more frequent checks.
- Rigid plastic generally retains moisture longer.
- Wind and heat increase water loss.
- A large leafy plant uses more water than a newly emerged shoot.
- Blocked drainage can leave the lower mix wet even when the surface appears dry.
Aim for reasonably steady moisture while plants are growing actively and forming tubers. Avoid repeated shallow splashes that wet only the surface, but do not keep the entire container continuously saturated.
Apply water at the surface or soil level rather than deliberately soaking the leaves. If water immediately runs down one side, make several slow passes so the mix has time to absorb it.
As foliage naturally yellows near mature harvest, reduce watering. Demand is declining, and persistently wet medium is unnecessary at that stage.
Feed with restraint
If the potting mix contains no fertilizer, apply a balanced or lower-nitrogen product according to its label. Adjust the amount to the container volume rather than assuming that more fertilizer will produce more tubers.
Excessive nitrogen is one possible cause of lush, tall foliage accompanied by disappointing tuber development. Stop adding high-nitrogen feed if the plants are already producing abundant green growth.
Do not treat every yellow leaf with fertilizer. Yellowing can also result from water stress, disease, physical damage, or natural maturity. Check the whole plant and the condition of the medium before deciding what to change.
Manage sun, frost, heat, and rain
Keep the plants in good light under moderate conditions. During prolonged extreme heat, provide afternoon shade or move a portable container away from the most intense late-day exposure.
If frost threatens after shoots emerge, move the container to shelter or use a suitable plant cover. Remove or ventilate the cover when conditions improve so the foliage again receives light and air.
During prolonged rain, confirm that drainage openings remain clear. If the container can be moved under temporary cover, preserve adequate light and return it once the saturation risk has passed.
Troubleshoot common container-potato problems
A single symptom can have several causes. Before taking action, check moisture below the surface, inspect the drainage openings, consider recent weather, and examine both sides of the leaves.
| Symptom | Possible causes | Practical next action |
|---|---|---|
| Medium stays wet; growth is weak | Blocked drainage, excessive watering, compacted mix, possible rot | Clear outlets, remove standing water, pause watering, and assess drainage |
| Plant wilts and the mix is dry | Insufficient water, heat, wind, or a dry pocket | Water slowly until drainage appears and monitor more often |
| Plant wilts but the mix is wet | Root stress, poor drainage, heat, or disease | Do not add water automatically; inspect drainage, stems, and leaves |
| Foliage is exceptionally lush and tall | Excess nitrogen is one possible contributor | Stop high-nitrogen feeding and continue balanced care |
| Tubers appear at the surface | Medium has settled or washed away | Cover them promptly with loose mix |
| Tubers turn green | Light exposure | Follow the green-potato safety guidance below and cover the remaining crop |
| Leaves yellow gradually late in the season | Natural maturation may be underway | Reduce watering and prepare for mature harvest |
| Leaves develop lesions or collapse rapidly | Disease, frost, pests, or another stress | Isolate the symptom and seek a region-specific diagnosis |
| Leaves have holes, stippling, curling, or sticky residue | Possible insect activity | Inspect both leaf surfaces and identify the pest before treatment |
| Foliage is damaged after a cold night | Frost injury | Shelter the container and protect surviving growth |
| Plant declines during prolonged heat | Heat or root-zone stress | Provide afternoon shade and check moisture without saturating the mix |
Wet medium and suspected rot
If the mix remains wet long after watering, inspect the outlets first. Remove standing water and make sure the base of the container is not obstructed.
Do not respond to weak growth in saturated medium by adding fertilizer. Correct the drainage and watering problem first; fertilizer cannot restore air space to waterlogged mix.
Wilting
Always touch the medium before watering a wilted plant. If it is dry, water deeply enough for drainage to appear and monitor more often during heat or wind. If it is already wet, investigate drainage, stem damage, root stress, and recent temperatures.
Check whether the plant recovers as conditions cool before repeatedly soaking an already moist container.
Excessive foliage
Tall, vigorous foliage does not necessarily indicate a large crop below the surface. Excess nitrogen is one possible contributor to abundant top growth and limited tuber development.
Stop high-nitrogen applications, maintain good light, and allow the plant to continue without trying to force a correction with additional products. Crowding, cultivar, temperature, and harvest timing can also affect tuber formation.
Exposed or green potatoes
Cover exposed tubers immediately. Light exposure causes greening and indicates conditions associated with increased glycoalkaloids.
Prevent further exposure by replacing settled medium and applying water gently enough that it does not wash the covering away.
Yellowing, spots, and rapid decline
Gradual, reasonably uniform yellowing near the expected end of the season can be natural dieback. Abrupt collapse, spreading lesions, or sharply defined spots require closer assessment.
A short symptom guide cannot confirm blight, a nutrient deficiency, or another disease. Photograph the entire plant and both sides of affected leaves, note recent weather, and consult a local horticultural or extension diagnostic service when available.
Do not apply a pesticide or fungicide until the problem has been identified. If treatment is appropriate, follow the product label exactly.
Insect pests
Possible potato pests include Colorado potato beetles, potato leafhoppers, and aphids. Inspect both sides of the leaves, along with stems and growing tips. Smart Pot identifies Colorado potato beetles and potato leafhoppers as pests that can be removed by hand when practical (potato-pest guidance).
Do not assume every insect is responsible for visible damage. Identification matters because unrelated insects require different responses, and some visitors may not be harming the crop.
Frost and extreme heat
Frost can injure exposed foliage even when the seed piece remains protected below the surface. Cover or shelter the plant before a forecast cold event.
Prolonged extreme heat can stress both foliage and the root zone. Move a portable container to afternoon shade when possible, but check the medium before adding water. Heat-related wilting does not always mean that the roots are dry.
Harvest new potatoes or wait for a mature crop
Decide whether you want a limited serving of tender new potatoes or the fullest mature crop the plant can produce. The harvest cues are different.
Harvesting new potatoes
New potatoes are immature tubers harvested around or after flowering. Flowering is a useful cue rather than an exact timer because varieties and growing conditions differ.
To take a limited harvest:
- If the mix is extremely dry and hard, moisten it lightly beforehand.
- Reach carefully into the medium near the container edge.
- Feel for suitably sized tubers without pulling up the entire plant.
- Remove only a small number.
- Replace disturbed medium and cover the remaining crop.
Searching around the roots causes some disturbance. If the plant is small or stressed, waiting may be preferable.
Harvesting a mature crop
For mature potatoes, wait until the foliage yellows and dies back naturally. A broad estimate is approximately 65–100 days, but variety, potato type, temperature, and growing conditions can shift the date considerably.
Reduce or stop watering as the foliage dies. Some guidance recommends waiting approximately two weeks before the final harvest so the crop remains in relatively dry medium. Treat that as an option rather than a universal requirement. If the container is waterlogged, the crop is deteriorating, or severe weather is approaching, waiting may be counterproductive.
Harvest in shade so newly uncovered potatoes are not left in direct sunlight. For a manageable bucket or bag:
- Spread a tarp on the ground.
- Remove the dead foliage.
- Tip the container gently onto the tarp.
- Pull the medium apart by hand.
- Place sound tubers in a shallow tray or basket.
For a container too heavy to tip, work through the medium by hand from the top. Avoid sharp tools, which can cut hidden potatoes, and handle the crop gently to limit bruising.
Separate cut, punctured, soft, or badly bruised potatoes from sound storage candidates.
For storage potatoes, brush away loose soil instead of washing them immediately. Cure them in a cool, dark, ventilated place protected from freezing and direct sunlight. Exact curing periods and storage temperatures differ among the supplied guides, but the shared principles are darkness, ventilation, moderate coolness, and regular inspection (harvest and storage guidance).
Frequently asked questions
Can I grow potatoes from sprouted supermarket potatoes?
Yes. A sprouted supermarket potato can grow and may produce a crop. It remains a fallback rather than the lowest-risk choice because table potatoes may carry pathogens or may have been treated to discourage sprouting.
Certified seed potatoes are produced for planting and are the more controlled option. If you use a supermarket potato, reject anything moldy, soft, or decaying; sprouting alone does not prove that the tuber is healthy.
How many seed potatoes can I plant in a 5-, 10-, or 15-gallon container?
For a conservative beginner arrangement, use one seed piece in 5 gallons, two in 10 gallons, or three in 15 gallons. These are prepared seed pieces, not necessarily whole original potatoes.
The five-gallons-per-piece rule leaves more room than many published arrangements. Closer planting may still produce potatoes, but each plant receives a smaller share of the available growing volume.
Do I have to keep adding soil as potato plants grow?
No. Gradual filling is a useful beginner method: add medium around the lower stems as the shoots grow while leaving the active upper foliage exposed. Its clearest purpose is to keep developing tubers covered.
Some growers fill most of the container at planting instead. The supplied evidence does not establish either approach as universally superior, and an unusually tall tower does not guarantee a larger crop.
How often should potatoes in a container be watered?
Do not use a fixed daily or weekly schedule. Check the medium by touch and water slowly when the upper layer is dry, continuing until excess drains from the bottom.
Inspect more often as plants become large and during hot, dry, or windy weather. Fabric bags may require closer monitoring than rigid plastic pots. Reduce watering as the foliage naturally dies back before mature harvest.
Can I eat potatoes that turned green in the container?
No. Discard green potatoes rather than trying to make them safe by cutting away only the visibly green portion. Greening indicates light exposure and conditions associated with elevated glycoalkaloids (green-potato safety guidance).
Prevent recurrence by covering exposed tubers promptly, watering gently enough to avoid washing medium away, and keeping harvested potatoes in darkness.
Your short action plan: Choose a well-drained 10- to 15-gallon container, allow approximately five gallons of capacity per seed piece, and plant in loose medium once temperature and frost conditions are suitable. Water by touch rather than by calendar, keep developing tubers covered, avoid persistent saturation and excessive nitrogen, and wait for foliage dieback if your goal is a mature crop. These fundamentals matter more than elaborate towers or unsupported yield promises.