
Elephant Ear Bulb Planting Depth Is Measured From the Top
For a typical dormant elephant ear tuber, set the highest point fully underground with about 1-2 inches of soil between it and the finished surface.
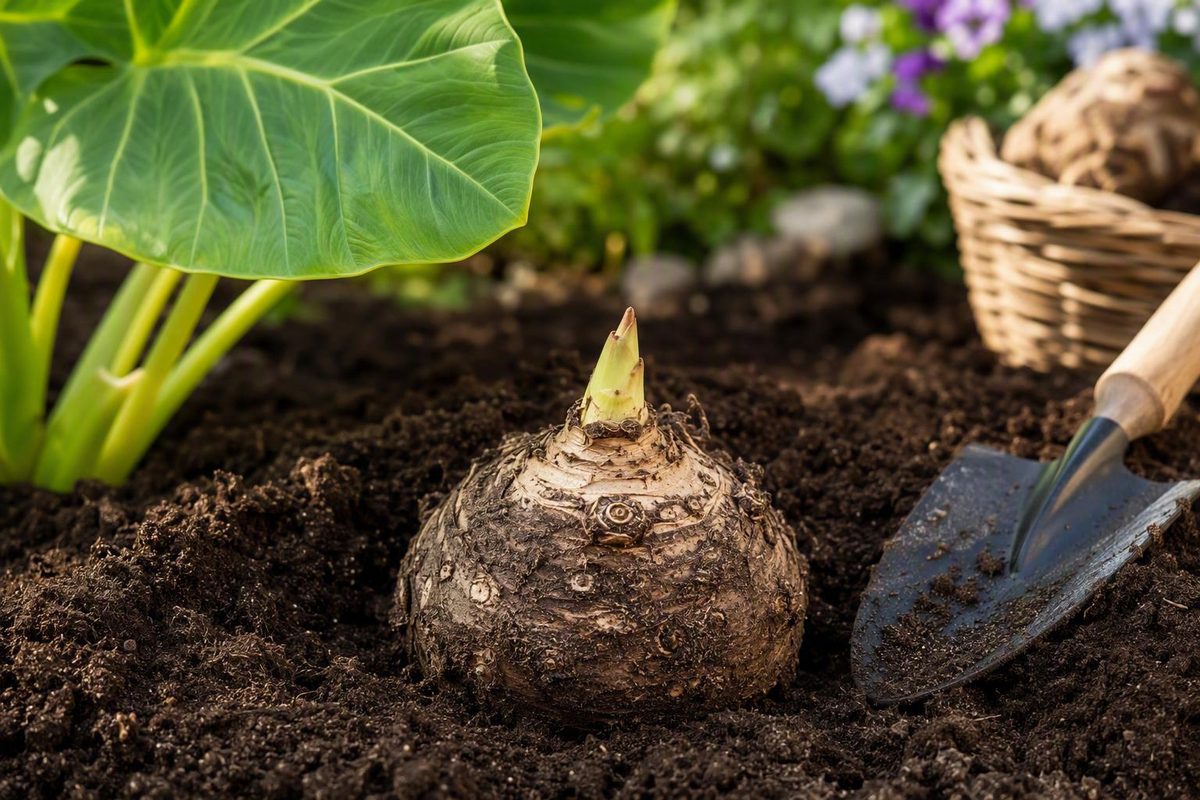
The short answer: cover the top with about 1–2 inches of soil
For a typical dormant elephant ear tuber, place it so its highest point is fully underground with approximately 1–2 inches of soil above it. Gardeners and sellers commonly call the planting material a “bulb,” although planting guides also describe it more precisely as a tuber. One garden-center guide recommends positioning the top about 1 inch below the surface in garden soil, indoor pots, and outdoor containers (Pasquesi Home and Gardens’ elephant ear planting guide).
This shallow-cover recommendation is a practical consensus among several commercial planting guides, not an independently established standard for every plant sold as an elephant ear. If the packaging for a named genus, species, or cultivar gives a clear planting measurement, follow those product-specific instructions.
The key is where you begin measuring. Measure from the highest point of the tuber to the finished soil surface, not from the bottom of the tuber or the bottom of the empty hole.
Three measurements are commonly confused:
- Soil cover: The soil between the tuber’s highest point and the finished surface.
- Tuber height: The vertical distance from the tuber’s bottom to its highest point.
- Hole depth: The distance from the finished surface to the bottom of the excavated hole.
Here is a simplified cross-section:
          FINISHED SOIL SURFACE
────────────────────────────────────
             1–2 INCHES
                OF COVER
                   ↓
              TUBER TOP
                  ▲
/ \
/ \
              | TUBER |  ← Tuber height
/
\___/
                  ▼
               ROOT END
────────────────────────────────────
          BOTTOM OF THE HOLE
For example, a tuber that is 3 inches tall may need its bottom positioned approximately 4–5 inches below the finished surface:
- 3 inches for the tuber
- Plus 1–2 inches of soil over its highest point
- Approximately 4–5 inches from the surface to the tuber’s bottom
That does not mean the tuber receives 4–5 inches of soil cover. Most of that vertical space is occupied by the tuber itself.
Treat the general range as a default rather than an inflexible rule. Instructions for one seller’s Colocasia esculenta bulbs permit the highest point to sit at least ½ inch below the soil line, illustrating why clearly stated directions for a particular product should take priority.
Why a 4–6-inch hole does not mean 4–6 inches of soil cover
Some instructions tell gardeners to dig a hole several inches deep. Unless the directions explicitly define that number as the amount of soil above the tuber, read it as an excavation or placement measurement.
The hole must accommodate the tuber’s physical height. A larger tuber therefore needs a deeper hole than a smaller one even when both receive the same shallow layer of soil over their highest points.
One commercial guide makes the distinction especially clear: it recommends loosening the soil more deeply and digging a hole about 5 inches deep, but it defines the final position by placing the tuber’s top about 1 inch below the surface (Longfield Gardens’ elephant ear guide). Those instructions are compatible because the tuber fills part of the hole.
| Measurement | Smaller tuber | Larger tuber |
|---|---|---|
| Tuber height | 2 inches | 4 inches |
| Soil above highest point | 1 inch | 1 inch |
| Approximate depth to bottom | 3 inches | 5 inches |
If you dig too deeply, do not simply place the tuber on the bottom and replace all the excavated soil. Add some loose soil back to the hole, position the tuber on that backfill, and check its highest point against the intended finished surface. Adjust the soil beneath it until the desired cover is achieved.
Conflicting commercial guidance does exist. One guide covering Colocasia, Alocasia, and Xanthosoma discusses holes approximately 4–6 inches deep, offers a general formula of two to three times the bulb’s vertical height, and suggests spacing plants about 4 feet apart. The same guide says requirements can vary by type and advises following the instructions supplied with the bulbs (Power Planter’s commercial planting guide). That broad formula should not be treated as an independently verified universal alternative to the shallow-cover guidance.
In practice:
- Determine whether “depth” means hole depth, depth to the tuber’s bottom, or soil above its top.
- Apply the shallow-cover default from the tuber’s highest point.
- Backfill beneath the tuber when an excavation hole is too deep.
- Follow package instructions when they identify the plant and clearly define the measurement.
- Do not assume that a 4–6-inch hole requires 4–6 inches of soil over an ordinary dormant tuber.
Find the top before placing the tuber
Before backfilling, look for an identifiable growth point. Depending on the tuber, the upward-facing side may have:
- A pointed area
- A central bump
- The beginning of a stalk
- A small green or pale sprout
Place that feature upward. If an apparent root end can be identified, place it downward.
             TOWARD THE SURFACE
                     ↑
               GROWTH POINT
                     │
__/ \__
/ \
               |   TUBER   |
/
\_______/
                     │
                  ROOT END
                     ↓
               DOWN INTO SOIL
Use visible plant structures rather than expecting a perfectly rounded bulb shape.
If the tuber has already sprouted, orient the visible sprout upward. Cover the dormant body to the appropriate level without unnecessarily burying developed foliage.
The available evidence does not support the claim that roots universally emerge from the top of every Colocasia tuber. It also does not establish a dependable orientation method for a completely featureless tuber with no visible point, bump, sprout, or recognizable root end. In that situation, consult the supplier’s labeled diagram or product photographs instead of inventing a rule based solely on shape.
Package-specific guidance matters because “elephant ear” is a common name applied in commercial literature to plants in several genera, including Colocasia, Alocasia, and Xanthosoma. Their planting material does not always look identical, and commercial instructions acknowledge that requirements may vary by type.
Planting a dormant tuber in the garden, step by step
1. Wait for suitable outdoor conditions
Plant after frost danger has passed and the soil has warmed to approximately 65°F. One Colocasia esculenta guide combines that temperature threshold with 1–2 inches of cover, rich well-draining soil, thorough watering after planting, and at least 3 feet of growing space for an adult plant (Eden Brothers’ planting guide).
2. Choose a suitable planting area
Use rich soil that drains adequately. Although actively growing elephant ears can use substantial moisture, that does not justify keeping an unsprouted tuber continually saturated.
Commercial recommendations differ, so check the product description and allow for the eventual foliage rather than applying one spacing number to every elephant ear.
3. Dig a hole that accommodates the tuber
Make the opening wide enough to position the tuber without wedging it against compacted sides. Dig deeply enough to contain the tuber and establish the intended final level.
At this stage, the hole may be much deeper than the desired soil cover. That is normal.
4. Backfill to establish the planting level
Return loose soil to the bottom as needed. Set the tuber in the hole temporarily and compare its highest point with the surrounding finished grade.
Add or remove soil beneath the tuber until its top will receive the intended shallow cover. This adjustment matters more than the original depth of the empty hole.
5. Set the growth point upward
Place an obvious point, central bump, beginning stalk, or visible sprout toward the surface. Set the recognizable root end downward.
If the package diagram for your named product differs from a general illustration, follow the package.
6. Fill around and over the tuber
Work soil around the sides to remove large empty pockets and establish contact with the tuber. Firm the backfill gently, but do not heavily compact it.
Finish with the tuber’s highest point fully underground at the recommended level. If loose backfill settles noticeably after watering, restore the finished surface without adding an unnecessarily thick layer.
7. Water after planting
Water thoroughly after backfilling.
After that first watering, judge moisture from the soil rather than from a fixed schedule.
8. Maintain restrained moisture before emergence
Keep the soil slightly moist while waiting for growth, not continually saturated. Moisture needs will increase once leaves and roots are actively developing, but a dormant tuber should not automatically receive the same watering treatment as a large plant in active growth.
9. Mark the location
Place a label or stake beside the planting spot.
Outdoor planting checklist
- Frost danger has passed and the soil is warm enough.
- The planting area is rich and drains adequately.
- The growth point faces upward.
- Cover is measured from the tuber’s highest point.
- The hole has been backfilled beneath the tuber if necessary.
- Soil is firm enough for contact but not heavily compacted.
- The area has been watered after planting.
- A marker identifies the location.
Containers and indoor starts: use the same shallow-cover default cautiously
A container may be deep without the tuber being deeply buried. Pot depth and planting depth are separate measurements.
Those benefits do not automatically require a thicker layer of potting mix over the dormant tuber.
For an indoor start:
- Choose a pot several inches wider than the tuber.
- Confirm that it has open drainage holes.
- Fill it with well-drained potting mix.
- Position the visible growth point upward.
- Use the same shallow-cover default unless the supplier specifies otherwise.
- Water to settle the mix, then keep it slightly moist while roots and shoots form.
- Provide bright light when green growth appears.
A garden-center guide recommends a pot several inches larger than the tuber, drainage holes, well-drained mix, and a top positioned about 1 inch below the surface. It applies that same depth to indoor starts, outdoor containers, and garden planting (Pasquesi’s indoor and container instructions).
Container guidance is not uniform. A separate article about container-grown Colocasia says to place the root end down with the bulb’s top around 4 inches deep. Its wording suggests deeper cover but does not fully explain the reference point, and the recommendation conflicts with the broader shallow-cover guidance. The article also recommends a container at least 18 inches wide and deep for most varieties and notes that large foliage can make a lightweight container easier to tip (Planters Place’s container guide).
Treat those container dimensions as one source’s baseline for a mature display, not a universal requirement for every cultivar or every temporary indoor start. Likewise, do not turn the isolated deeper-placement recommendation into a rule for all potted elephant ears.
Unless the supplier gives a clear alternative for the named plant, use the shallow-cover default. Select the overall container size separately, based on the plant’s eventual size and the need for stability.
Dormant tubers and established plants need different measurements
The shallow-cover recommendation applies to a bare dormant tuber. It should not be applied mechanically to an entire root ball from a nursery pot.
For a prestarted or established plant:
- Identify where the existing potting mix meets the plant.
- Position the root ball so that its previous soil line aligns with the new finished surface.
- Backfill around the root ball.
- Avoid deeply burying developed stems or foliage.
If the original soil line is unclear, the level where the leaves meet the basal structure may provide a placement reference. The objective is to preserve the depth at which the rooted plant was already growing, not to add a new layer over the entire root ball.
A large overwintered specimen also differs from a newly purchased dormant tuber. It may have old roots, substantial green growth, offsets, or an elongated basal structure that makes a simple bulb-depth rule less useful.
A 2005 gardening-forum discussion shows how unusual plants can generate unusual advice. A gardener asked about a very large overwintered elephant ear of uncertain species, and user “kdjoergensen” recommended 4–6 inches of cover measured from the bulb’s top. The contributor’s credentials were not established, the species was unconfirmed, and the available thread did not document the result (Dave’s Garden forum discussion).
That anecdote should not be generalized to ordinary dormant tubers. For an established or unusual specimen, preserve the former soil line when visible and prioritize instructions for the identified plant.
After planting: moisture, emergence time, and when to keep waiting
Elephant ear tubers may take several weeks to produce visible growth. Correct planting does not guarantee that a shoot will appear within a few days.
Commercial guidance gives overlapping estimates. One Colocasia guide says emergence may take approximately 2–8 weeks depending on soil temperature (Eden Brothers’ planting guide).
Another guide gives approximately 3–8 weeks, depending on temperature and soil moisture. These are expected ranges rather than fixed deadlines.
Other commercial instructions say elephant ear tubers may take a month or more to show growth, reinforcing that emergence can be slow even when the tuber has been planted as directed.
While waiting:
- Keep the soil slightly moist.
- Avoid persistently saturated conditions.
- Do not water solely because a set number of days has passed.
- Leave the location marker in place.
- Avoid repeatedly disturbing the tuber to inspect it.
- Reassess warmth, drainage, and planting depth if growth is delayed.
Once leaves appear and active growth begins, moisture demand can increase, but watering should still reflect actual conditions.
The supplied evidence does not establish one universal deadline or one dependable set of home viability tests for every genus and cultivar sold as elephant ear.
Use this compact decision guide:
- Conditions are cool but otherwise suitable: Continue waiting while maintaining restrained moisture.
- Soil remains persistently saturated: Correct the watering or drainage problem rather than adding more water.
- The tuber may be too deep: Check whether a hole-depth measurement was mistaken for soil cover.
- The supplier’s expected emergence period has passed: Contact the supplier for guidance about the named product.
- The plant was established rather than dormant: Evaluate it according to its former soil line and transplant history.
The usable rule is straightforward: set a typical dormant tuber with its growth point upward and a shallow layer of soil over its highest point. Judge that cover from the finished surface, not from the bottom of the hole. Plant after frost danger has passed and the soil is warm, use well-draining soil, and maintain restrained moisture while allowing several weeks for emergence. For named varieties, rooted plants, or unusual overwintered specimens, follow the supplied instructions or preserve the previous soil line.
Is elephant ear planting depth measured from the top or bottom of the bulb?
Measure soil cover from the highest point of the tuber to the finished soil surface. Do not begin at the bottom of the tuber or the bottom of the hole.
The hole will be deeper than the cover because it must also contain the tuber itself. Seller-specific instructions likewise define placement by putting the highest point below the soil line rather than treating the full hole depth as cover.
Which end of an elephant ear bulb goes up?
Place an obvious point, central bump, beginning stalk, or visible sprout upward. If you can identify an apparent root end, place it downward.
If the tuber has no recognizable growth point, sprout, or root end, check the supplier’s labeled illustration. The evidence does not establish a universal orientation trick for a featureless tuber.
Should elephant ear bulbs be planted 4–6 inches deep?
A hole may be 4–6 inches deep because it must accommodate the tuber, but that does not necessarily mean the same amount of soil should cover the tuber’s top. Commercial guidance using that hole range also acknowledges variation by type and recommends following the instructions supplied with the planting material (Power Planter’s elephant ear guide).
For an ordinary dormant tuber, use the shallow-cover default unless clearly worded instructions for the named plant specify otherwise. Backfill beneath the tuber when the preparation hole is too deep.
How deep should an elephant ear bulb be planted in a container?
Use the same shallow-cover default as a practical starting point. A deep container can provide root volume and stability without requiring deeper burial.
One container article recommends positioning the bulb top around 4 inches deep, but that wording is ambiguous and conflicts with broader shallow-cover guidance (Planters Place’s container guide). Follow a clear supplier instruction for the named variety rather than assuming all container-grown elephant ears require deeper cover.
How long does an elephant ear bulb take to sprout?
Allow several weeks rather than several days. Published commercial estimates vary with warmth and soil moisture, and some tubers may take a month or longer to show growth.
Keep the soil slightly moist but not persistently saturated. If the supplier’s stated emergence period passes, reassess temperature, drainage, and planting depth, then contact the supplier before concluding that the tuber has failed.